
I make pita breads regularly, usually at the request of oldest daughter, make a large enough batch to put some in the freezer and keep her happy for a while. Making pita breads or bagels puts the baker into a production line, once you’ve mastered the recipe you’ll fall into a rhythm between pre-shape, rolling and shaping every little 100g of dough, waiting to be poached or baked. In my house they’re used for dips, as toast in the morning, after school snacks and often in my case toasted and filled like the one below, with leftover salmon and salad for my lunch.
I started making them back in 2010 following a sponge method recipe from the net and over time I’ve tried different recipes and variations, yeast, hybrid, sourdough, all roller white flour, half white half wholemeal, high gluten flour, low gluten and others I’ve forgotten. I’ll give the recipe for my last batch yeast ones, and guidelines to make hybrids or sourdoughs.

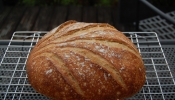
Pita bread is the very opposite of a bagel, it shouldn’t have the chewy characteristics of the perfect bagel. Freshly baked they should be soft and tear apart easily, and if you’re my daughter the perfect one also has some patches of tinged brown crispness. Figuring out the best and easiest way to achieve this was in part hit and miss of my different trials and in part coming to the conclusion of what the No-Knead Bread phenomenon produces.
If you mix bread initially and then don’t touch it at all until shaping, you’ll have a dough that’s tricky to shape for a loaf but it will produce a softer loaf. Don’t confuse No-Knead method with the folding method, as folding at intervals will still work the gluten, stretching and strengthening them. Trust me, over the last 2 years I’ve made plenty of breads both ways to say they produce different textural results. I will talk more about the folding method in a post soon on Mixing & Folding Methods.

Tips
My tips are don’t work the dough at all, mix it initially, has to be wet enough for a well amalgamated dough, don’t even worry if it’s on the sticky side, see below how one batch turned out like that but was still very workable. Once mixed leave it until you want to shape it.
Use slightly less yeast than you would for a loaf and cut the time of rising until dough rises by a third-ish. This time of winter I leave mine for 2hrs or so. Using slightly less yeast means an easier time on the bench when rolling them and the resting in-between while waiting to go in the oven.
If you’re using very high gluten flour like the Canadian or similar which sits around 14% or more protein then be aware this flour is a power house of gluten, and you’re fighting against them to maintain a soft texture. If you’re not happy with the first results then I would recommend what Dan Lepard suggest in his Short & Sweet book, to mix in some all purpose flour.
Because I keep mine for the following days and freezer I add a little oil to the dough as it helps to keep them better, if they’re to be eaten on the day I don’t.

Mix Flours Up
Below is a guide but the pita breads in the photos, I have replaced some of the white flour with:
200g of stoneground white flour,

and other batch replaced with 150g wholemeal rye flour sieved in very fine mesh sieve.

Basic Pita Bread Recipe
You’ll need baking sheets.
- 500g white bread flour (I used 12% protein, Shipton no.4 organic)
- 8-10g salt
- 4g dried instant yeast
- 15g runny honey (or use sugar, other syrups) I’ve made it plenty times without any sort of sugar but like the balance this small amount gives
- 10-15g vegetable oil
- 300g water or more *See Note

Mix everything together.
Add the oil and the honey directly on top of the water, it’s easier to mix in that way.

Mix everything really well.

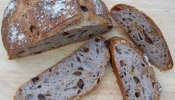
One of the doughs below had some white stoneground amaretto, the other some wholemeal rye sieved.

I can’t remember now which of the doughs was a touch too wet, you can see by my hands, leave it to rise as normal.
Let the doughs rise some, see below they had risen roughly a third, in this cold weather took about 2 hrs.

Tip the dough on to floured worktop, you’ll notice underneath lots of holes, activity going on.

To make your life easier fold the dough in half but leaving the ‘outer’ side, the drier side, on the outside. What was the underneath of the dough in the bowl becomes the inside.
This is because the underneath side, the holey side, is quite damp and sticky, if you fold this in then on cutting the dough you’ll be touching and dealing with the drier part.

Weigh your dough, mine range between 100-115g.
Then bring the together with your hands into a ball and pinch it tight creating a nice tight ball shape.

Put them in order as you go, remembering which is the oldest ball. This is good practice with all doughs when making lots because it’s rest time for the dough and when it comes to shaping it means the gluten will be more relaxed and easier to shape.
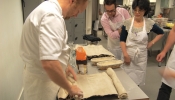
Flour the work surface and shape them, I tend to do long shapes because then they fit into the toaster!

You’ll need to put enough pressure on the rolling pin to get it to shape.
If they’re incredibly tight, and spring too much back then leave it, go to the next one roll it out as much as you can, carry on like so, until you’ve gone through all of them.
Return to the first one again and by this time the dough will be more relaxed easier to shape thin enough and won’t fight with you.

Baking
When I turn the oven on I put the baking sheets in to heat them up. When oven is hot so will the baking sheets which means the pita will hit a hot surface straight away.
How long you bake them for will depend on your oven but mainly how thinly they’ve been rolled.

I never tire of seeing them puff up.

On a Skillet
I started making pita in 2010 when these photos were taken, and for some reason which I can not remember now I use cook them on a skillet. The perfect bread for camping don’t you think, of even barbecue.

The problem with cooking them on the stove top, is they need more attention and also more patience which I don’t possess. I would speed up the heat and burn them.
The good part is if your oven fails doesn’t stop you from making a quick bread.


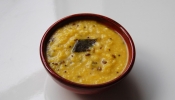
Christmas week, kids at home, father-in-law came over and I turned leftover turkey into a filling with onions, herbs, tomato, pimentón. Baked some pitas and a meal was put together with very little effort.
Father-in-law kept asking how was it when putting the knife through the pita to open they split evenly in the middle? I showed him the rest puffing in the oven…aahhhh.


{ 12 comments… read them below or add one }
Yes! Homemade pita bread! I haven’t done this in a while. Good excuse to make some falafel. Which I bet would be good with some Ranch dressing. (Recipe is coming I promise.)
Can’t wait Monica!
Just been thinking about parsnip hummus.. Perfect with your pittas and totally seasonal ,
Like your idea of shaping with toaster in mind. One of the posters on TFL, shared his idea of using a small electric grill (eg George Foreman) to quickly cook flatbreads. Works well when making a few. I sometimes ‘steal’ some bread dough at the shaping stage, to use this way.
http://www.thefreshloaf.com/node/25890/flatbreads-george-foreman-grilling-machine
Pitta bread is such a great way of eating salad. I’ve baked them in a clay oven and when they puff up in a matter of seconds it is always like magic. Thanks for the reminder to make some. I’m just coming off a juice diet and don’t want to eat lots of bread so this is a good way to ease back into bread eating and have plenty of the healthy stuff at the same time. And falafel with some tahini dressing is totally lush.
Nice post. Great looking breads too. I’ve been wanting to make pita forever. Will have to try your method on day, x
I’ll confess Tamsin the only way I like parsnips is roasted…could imagine roasted parsnip hummus, yum!
Nice idea Robyn, like it.
Come over here Gloria and I’ll stuff you with plenty of salad and pita!
Forever is a long time darling – if you’re not up to it…how about getting B. to make some for you? xx
xx
Hi Azelia,
Although I’ve been making bread for a number of years I have never made pitta bread until last night. I followed your very detailed instructions and used a mixture of Canadian and spelt flour, the results were delicious. Thank you so much for your blog and sharing your enthusiasm.
Barry
I’m pleased to hear it Barry, glad you liked it.