Why Does My Pastry Shrink? Step-by-step Guide to Shortcrust Pastry
Your pastry shrinks because it contains liquid which will evaporate during cooking. There’s a lot of advice out there to tackle the problem with shrinking pastry. Advise given is usually along the lines that your pastry is being overworked, let your pastry rest, make sure you blind bake, don’t over roll it, working fast, keeping it cool and so on. All of this is good advice but even following these good practices with making pastry it’s inevitably that your pastry will shrink some.
Your pastry contains liquid, not just the obvious milk or water you add, but egg and fat contain liquid too. As it bakes some of this liquid will evaporate making your pastry contract a bit. You can follow a few steps to ensure it will contract the minimum amount possible. The worst kind of shrinking is when the sides of the pastry shrink downwards making it impossible to fill the cases with the filling you’ve prepared...yes been there.
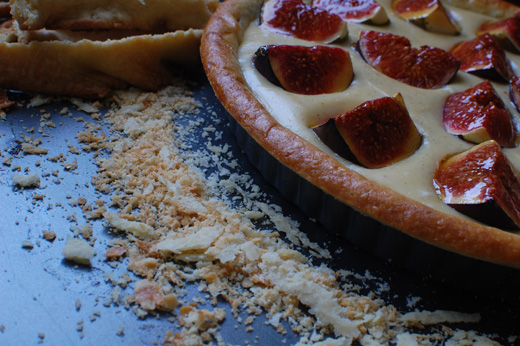
Over the last 20 years of making pastry I spent most of the time cutting the pastry raw once fitted into the tin, blind baked and filled with whatever. But most recently I’ve been making it the other way. There is a good foolproof way of stopping your pastry from coming away from the sides of the tart tin giving you the maximum height of the tin and it’s a method used by chefs, letting the pastry hang over the tin and only cutting it after baking. This will give the most desirable results as far as shrinking goes.
The first time I did it this way the pastry was cold and I wasn’t happy with the result, looked a bit messy, maybe it didn’t help that my knife wasn’t as sharp as it could be. The second time, I cut the pastry while it was still warm and this way I had excellent results, my cut was very neat and I had an edge as good as the other method. I’ve put details of both ways below. I have photos from about 3-4 different tarts I’ve made over the last few months, and that’s why you’ll see different colour doughs, some would have been made with eggs some not.

Metal Tart Tins, Ceramic Dishes
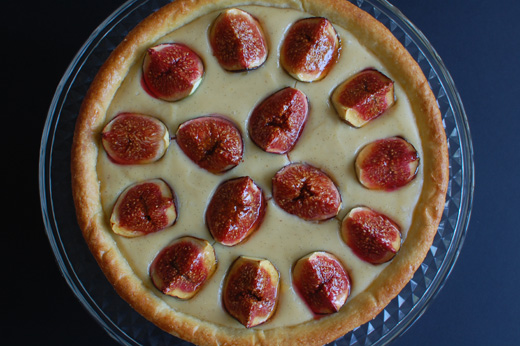
I’m going to point out the obvious here, when making pastry if you want to be sure you don’t have a soggy bottom in your tart use a metal tin not a ceramic or glass dish. They are very bad conductors of heat and you’re asking for trouble, so if you use them be aware. I find those type of dishes better suited to when you make a pie that only has a top crust.
Also a tart tin that is coated with non-stick is worse for conducting heat than ones without, but you’ll see from the photos below I use both. Non-stick tins are so popular now it’s becoming hard to find ones without the coating of non-stick.

Half Fat to Flour Shortcrust Pastry
The easiest shortcrust pastry to make for me is the one I make for the mince pies, it’s flour and fat and a little milk to bind. This pastry is so well behaved that once I make it in food processor I can roll it out straight away without having to chill it first, this is because all of the ingredients are still cold. The ratio of a normal shortcrust pastry for either sweet or savoury tarts is easy to remember, half amount of fat to flour, whizzed into breadcrumb texture and a little milk or water to bind it, sometimes they have an egg.
Mince Pies Pastry
For the fat in the mince pies pastry I use half butter and half vegetable shortening, this combination gives me a slightly flakier pastry than if I use all butter.

Other Shortcrust Pastries
The other variations on shortcrust pastry are richer doughs, made with either a higher percentage of fat to flour and they also contain egg. Some also can be quite sweet with equals amounts of icing sugar to butter. Here’s the definition of various shortcrust pastries in my Larousse Gastronomique and Michel Roux’s book.
Pâte Brisée – A basic pie dough which can have an egg or not, and usually half butter to quantity of flour. You can sweeten it with a little sugar.
Pâte Sucrée – A sweet dough, sugar can be as much as the amount of fat in the recipe. Usually half fat to flour ratio but will also have a whole egg to help bind together the sugar, fat & flour.
Pâte Sablée – A sandy pastry, that’s the translation for sablée, referring to its texture, meaning it’s very short and crumbly because it has a high percentage of fat to flour and has egg, sometimes whole egg other times even richer with just egg yolks. It’s the sort of pastry you need to keep very cold and rest...it’s high maintenance.
Pâte à Foncer – Lining pastry for flans or tarts. I would be pushed to tell the difference from this to a pâte brisée above, the ingredients in both recipes in my Michel Roux Desserts’ book are almost identical.
You’ll find variations on these in different books and pastry chefs will have their preferred recipe which they have tweaked over time.

Mixing Pastry
The Usual Method
I make my pastry in a food processor for the simple reason that it’s so quick and using the butter cold from the fridge it means it can be done in a few minutes and the chance of overworking the dough is smaller. Traditionally you rub the fat with the flour first until it resembles breadcrumbs, you then add your milk or water or egg if using.
All In One Method
I have short-cut this process by adding the egg at the same time as the fat and flour in the processor, stopping to see if needed additional liquid. I wasn’t convinced this resulted in as good pastry as the usual method.
Short Texture
When you mix the fat into the flour really well so the breadcrumb particles are very small you’ll end up with a shorter texture according to my “How Baking Works” book because the flour that is covered in the fat won’t absorb the water. The flour that doesn’t come into contact with water won’t develop it’s gluten structure (something which I learned through researching for my Bronze Pasta post). Coating of flour well with the fat will result in a shorter, mealy texture.
Flakier Texture
Interestingly enough in the same book it states if you want a flakier texture in your pastry you want to keep the particles of fat larger in the flour and not rub so finely. To achieve this texture it’s paramount that you use ice cold water when mixing to make sure the butter in the flour stays cold but you also don’t want to overwork your dough and risk the change of developing the gluten in the flour, making pastry tough.
Note on Crumble Topping (Crisp Topping)
Though this is not pastry I wanted to point out here since discussing flaky pastry and short texture pastry that if you keep bits for the topping of crumble large when rubbing the butter into the flour it will have a flakier/crumblier texture than if you rub it very finely….and yes I shall do both ways and post my findings.
Variables on the Same Recipe
You can follow a recipe to the letter but sometimes you have to keep an eye out for differences which recipes can not tell you about, some flours absorb more moisture than others so changing brands of flour can make a difference, egg sizes differ, making a pastry in the summer can differ to making in cold winter. None of these are going to effect you making pastry and it’s not going to stop binding it together but realise that sometimes it can be sickier or drier using the same recipe for these reason and you need to compensate for that.
Shortcrust for my Mince Pies
Below is the mince pie pastry recipe of equal amounts of butter and vegetable shortening to twice the amount of flour, whizz in the food processor for a few seconds until breadcrumbs.


When the butter and fat has been distributed throughout the pastry, add the milk. Whizz again until the dough starts to come together. Don’t wait until it forms a ball as that sometimes doesn’t happen quickly and you can run in danger of over-working the dough waiting for the ball to be created.
When the dough starts to look like it wants to come together stop the machine grab a little dough press it together and it should feel moist and hold its shape. The reason for doing this is you’ll get use to how the dough should feel and compensate for the reasons I’ve mentioned.

Below I wanted to show the texture of the pastry how it’s soft and pliable. In this type of pastry if everything is still quite cold you can roll it out straight away on a floured board, otherwise cool it first in the fridge for 30 mins.

A Richer Shortcrust Dough
If you using a recipe that has a higher butter content than the one above then you may find like here the breadcrumbs are different from above, they’re more clumpy. You have more moisture in the dough and the crumbs are not going to be as tiny and dry.


After adding the milk (and if using egg) I literally only whizz it for seconds until it starts to clump together, checked the dough was moist and came together smoothly.


Chilling the Dough Before Rolling
This is especially important for rich doughs to keep everything cold so when you are rolling it out the dough is firm and manageable. As soon as the butter starts to melt you have an unruly child on your hands.
I like to flatten my dough into a disk because it chills out quicker and more evenly.

Rolling Out the Dough
Rolling out the dough is not complicated but this often where I read people getting stuck. By the way if you have left your dough too long in the fridge it can become too hard to roll out. I try to make it succumb by pressing down hard with the rolling pin and roll it out and sometimes it works but otherwise just give 10-15 mins or so out before starting to roll it.
Make sure you flour the surface but also spread a very thin film of flour over the dough, spread it with your hand lightly. Flour the rolling pin. Every 2-3 times of rolling actions turn the pastry a quarter of way around, this will stop the pastry from sticking. Make sure after a few times of rolling to sprinkle some flour again over the surface. I like to at this point to turn it over, flour what was the underneath and continue rolling it out, this will stop dough sticking.
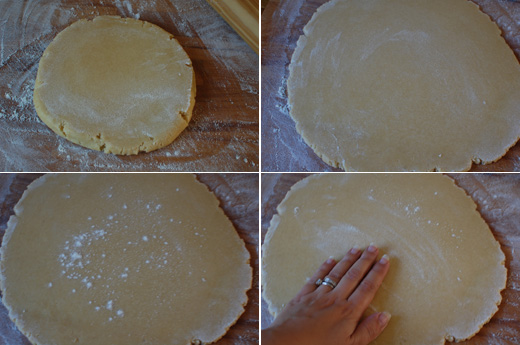
Keep a thin film of flour on the surface of the pastry especially if it’s a rich dough, not too much flour to distort the texture.

This is what can happen if you don’t keep it floured, the pastry becomes tacky and sticks to the surface or rolling pin.

If you don’t want to turn over your pastry just make sure now and again you flip it over and flour the surface to prevent sticking.

Check your pastry is big enough for the tin.

Start wrapping loosely around the rolling pin.

Lift it over the tin and place it down carefully.


What you want to make sure when placing it over the tin is to watch out for what’s happening below and not letting the edge of the tin cut into the pastry.
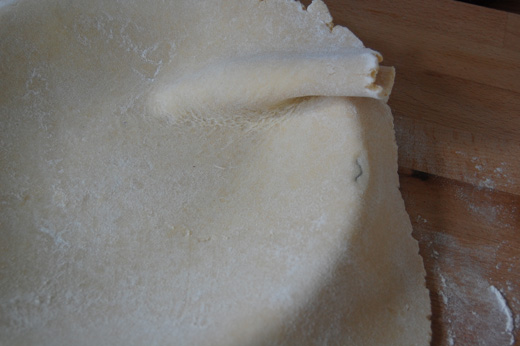
Lining Your Tart Tin
For me this part of the pastry making is as important as making sure your pastry is not over-worked. When you’re pressing the pastry into the tin, you want one hand to lift it up and push it down into the inside of the tin while the other hand helps it set right into the corner gently.


All of the time you’re pressing down into the inside of the tin and NOT stretching the dough outwards, this will help with the shape of the tart. Doing this is also very important if you want to cut your dough into shape while it’s raw because if you stretch your pastry outwards as it shrinks it can really distort the shape.


Don’t hurry this step, a little patience is required. If you want to cut the pastry while raw the easiest way for a serrated edged tin is rolling the pin over the edge of the tin.

Making Holes
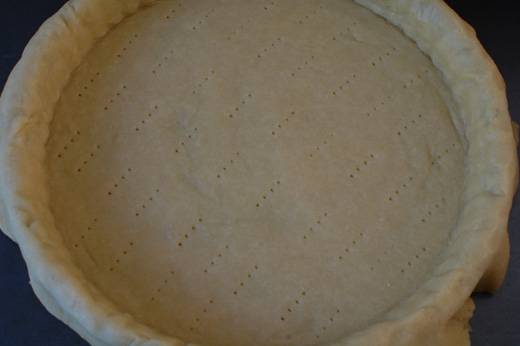
Using a fork prick holes all over the bottom of the pastry, but not all the way through, this helps with stopping the pastry getting air trapped underneath and puffing up.
Resting in the Fridge Before Baking
This is an important step. I’ve got away without doing it but it’s best to put it to rest in the fridge for a good hour to chill it right down. You can prepare pastry to this step and have in the fridge for 24hrs or freeze it.

Blind Baking
For baking blind you can use ceramic beans like here, or just ordinary dried beans which I used for years before buying these. I’ve also heard of people using rice and old coins. If I recall the reason for using rice was to help shape the pastry better but I’ve never had problems with the beans. The only thing I can think of for using coins is that the metal conducts the heat well so I’m guessing it’s helping baking the pastry faster.
You’ll notice I use foil and not paper as many recipes say. I find that I can gently shape the foil into the tin better than paper and again it conducts heat of its own helping to cook the pastry faster.
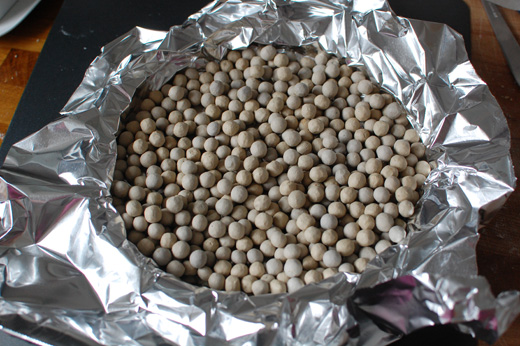
When the pastry looks like this, it’s usually had 10-15 mins medium heat, it’s starting to shrink away from the tin a little, the edge of the pastry looks almost set I like to remove the foil to let the bottom dry out.

From the photo below you can see the bottom is still soggy and that’s why I’ll put it back in the oven for another 5 mins to dry it out.
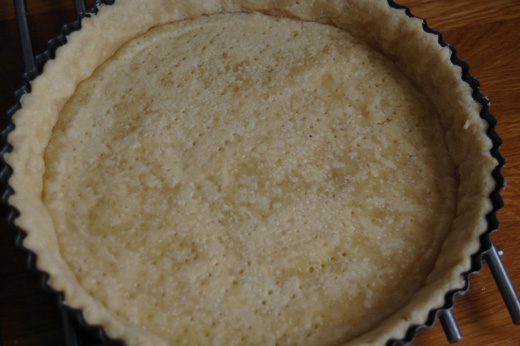
Depending what I’m using the pastry for I may cook it a little longer than just drying it out. For example if I wasn’t going to cook the filling, just use the pastry like this to later fill it in with whipped cream and fruit I would make sure the pastry is baked all the way through properly or if the filling was having a very short burst in the oven, like with my Fresh Fig Tart.


Filling the Tart
The easiest way to make sure the filling is right up to the brim of the pastry is finish filling the tart once you’ve placed it in the oven.
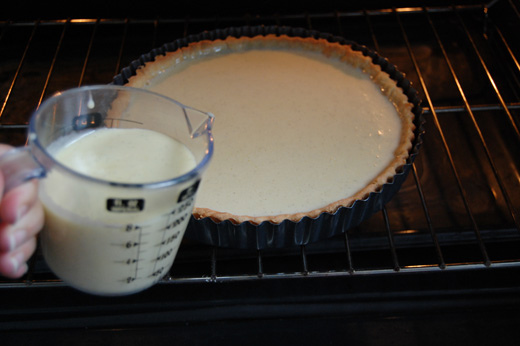

Taa-Daa!….and here’s one I prepared earlier….

Glazing the Pastry
Once you remove the baking beans and before putting back in to the oven to dry it you can glaze the shell with beaten egg, it will give it a good colour and especially good idea if you’re worried about your filling leaking through.
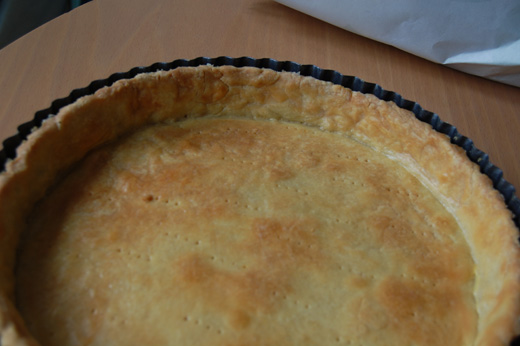
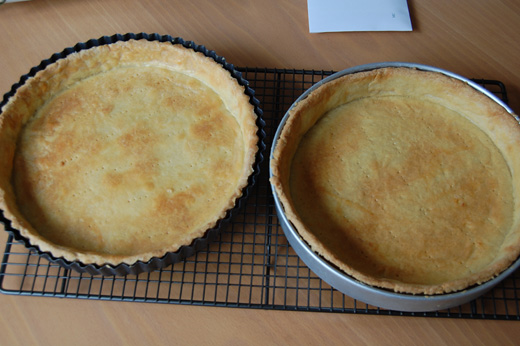
Plain and Serrated Tart Tin
A serrated edge tin can help with keeping your pastry in place. A plain edged tart tin can be a nightmare especially if it’s non-stick. If you want to use a plain edge tin giving the tart a modern look then the method of leaving the pastry hanging over and only cutting after baking is the answer.

…this is what can happen

A rather sad looking tart shell….

Just wanted to show you it’s doable of using a plain edged tin and cutting pastry before baking with decent results but doesn’t always turn out good. You have to be careful when shaping the dough into the tin, not stretching it out as I’ve explained earlier and cutting the pastry on the generous side allowing for shrinkage.


Leaving the Pastry Hanging Over the Sides
This is the way to give you the least shrinkage. And the best way to deal with smooth edge tins.

Once the tart is ready but still a little warm with a very sharp knife carefully cut away the excess pastry…and Voilà!

